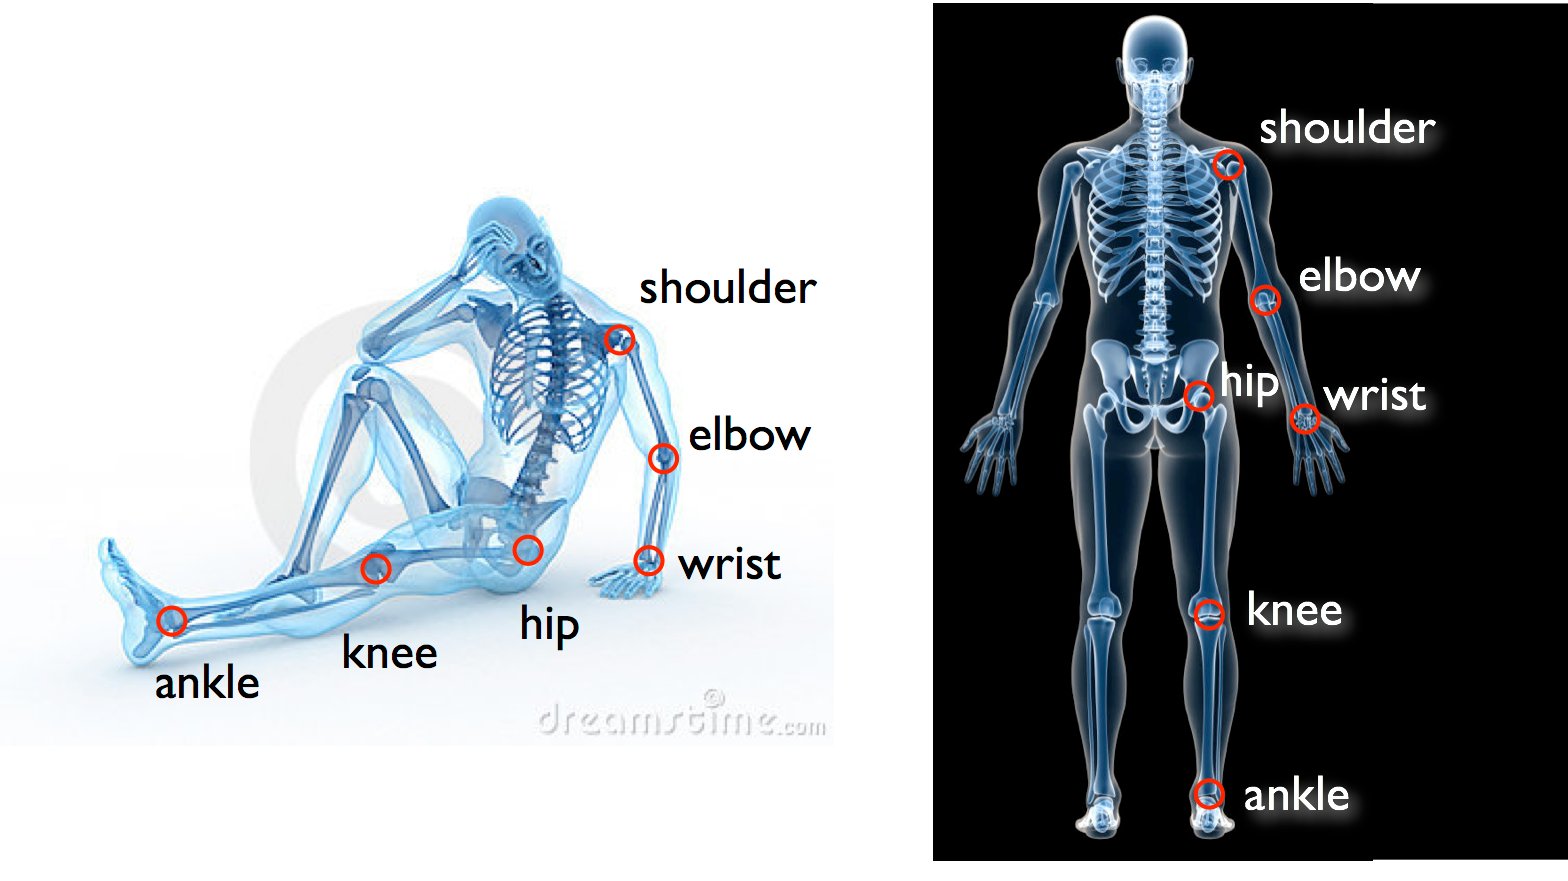
Example annotations for person
If the image or the names of keypoints does not display, your browser may not support this interface. Try the latest Chrome, Safari or Firefox browsers. Press the "Accept HIT" button before starting working on the HIT.Task Guidelines
Interface Instructions:- Mark all the keypoints of the person by dragging each of the keypoints to its correct location. In the case of multiple people mark the keypoints of the person with the face marked by a red rectangle. Use blue markers
 for visible keypoints and red markers
  for occluded keypoints. See these examples to see what we mean by occluded.
- Note that left and right are from the point of view of the person. See examples.
- Press the Submit Results button at the bottom once done.
- Press p or P if you need to reset the annotation.
Mark the locations of the following keypoints :
- Nose : nose
- L_Eye : left eye
- R_Eye : right eye
- L_Wrist : left wrist
- L_Elbow : left elbow
- L_Shoulder : left shoulder
- R_Shoulder : right shoulder
- R_Elbow : right elbow
- R_Wrist : right wrist
- L_Ankle : left ankle
- L_Knee : left knee
- L_Hip : left hip
- R_Hip : right hip
- R_Knee : right knee
- R_Ankle : right ankle
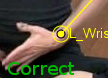
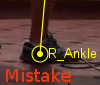
Important: When marking a location of shoulders, elbows, wrists, hips, knees, and ankles place the points at the location of the corresponding
body joint. Here is the illustration of the joint positions on the human skeleton for two different viewpoints:
A common mistake is to place the keypoint at the tip of the knee or elbow. Here is an example of correct and incorrect placement of knee and elbow keypoints:

 and
and


Here is an example of correct and incorrect placement of wrist and ankle keypoints:
 and
and

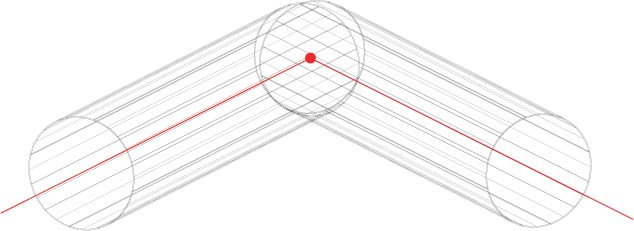
Another way to find the joint is to think of the adjacent limbs as a cylinders. The joint location between the limbs is then defined by the intersection of the
axes of adjoining cylinders. Take a look at this illustration.
Hint: you can use the keyboard keys as an alternative to drag and drop method to place the keypoints. The keys are: 'q' - right shoulder, 'a' - right elbow, 'z' - right wrist, 'w' - left shoulder, 's' - left elbow, 'x' - left wrist, 'e' - right hip, 'd' - right knee, 'c' - right ankle, 'r' - left hip, 'f' - left knee, 'v' - left ankle, 't' - nose, 'g' - right eye, 'b' - left eye. You can use 'shift' plus one of these keys to mark keypoint as occluded, and 'space' to toggle between occluded and visible keypoints. You will need to click on the image once before starting to use the keyboard.
Occluded joints: For occluded joints try to guess the
joint location based on the pose of the person and use the occluded marker . For joints that fall outside of the image leave the markers
untouched.
If you accidentally moved the marker but the corresponding
keypoint is not inside the image, put it back in the black area. We will
evaluate all the keypoints placed on the image.
Nose Tip: The location is the tip of the nose, regardless of frontal or profile view.![]()

Eyes: place the marker at the midpoint of the two eye corners. 
in that case. However, eyes are considered occluded if the head is turned away from the camera, see this example.
Example Annotations
 |
 |
 |
 |
How to label keypoints under occlusion and partial visibility
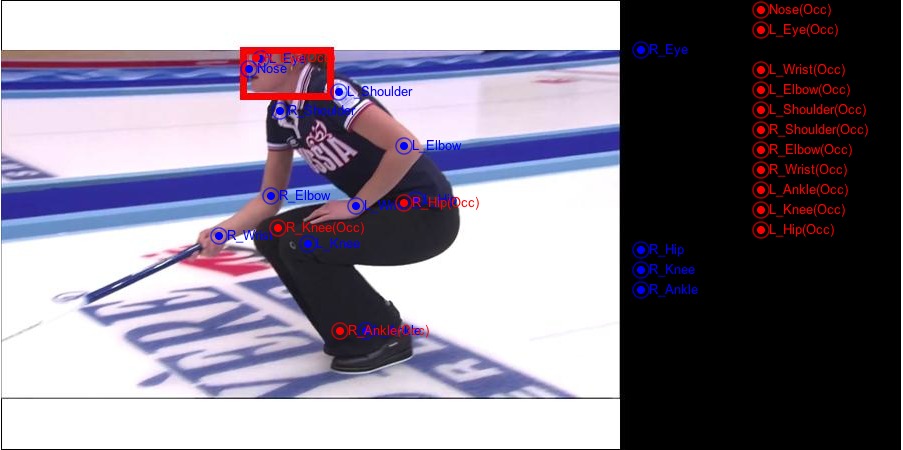 |
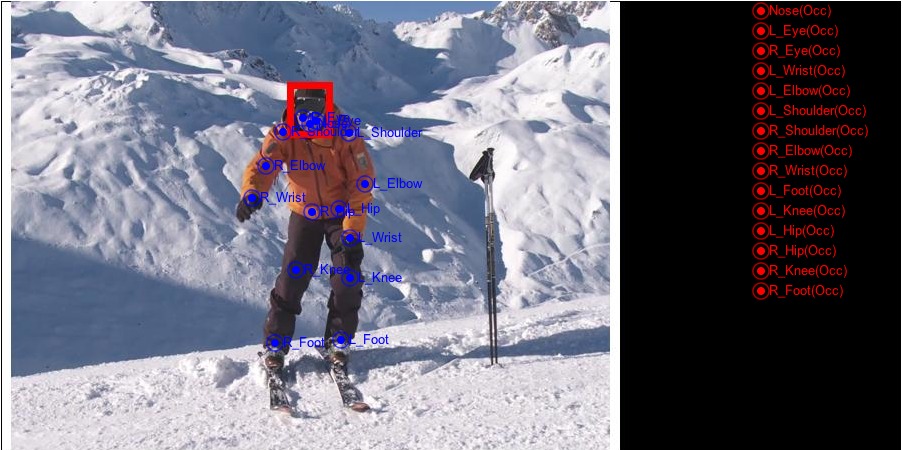
The right leg of
the person is occluded by the left leg. Use the occluded markers |
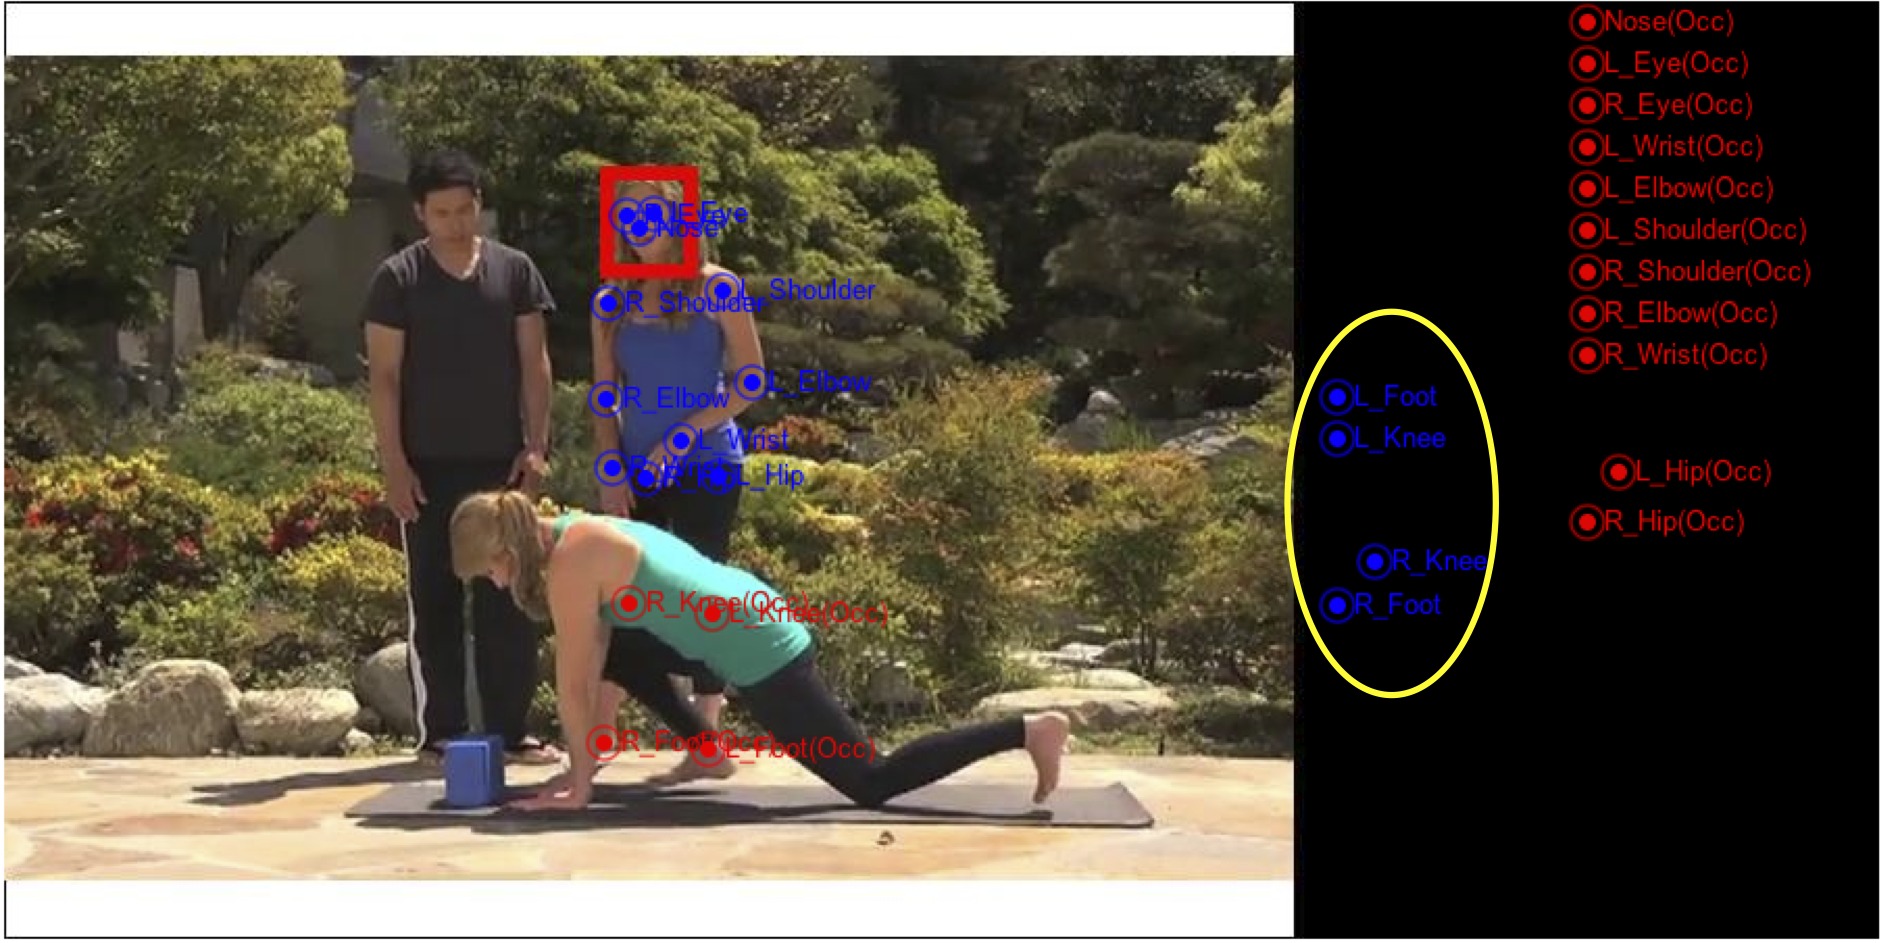 |
The legs of the person are occluded by another person. Use the occluded markers |
 |
The lower part of the person body is not visible in the image. Leave the keypoints in the black area. |
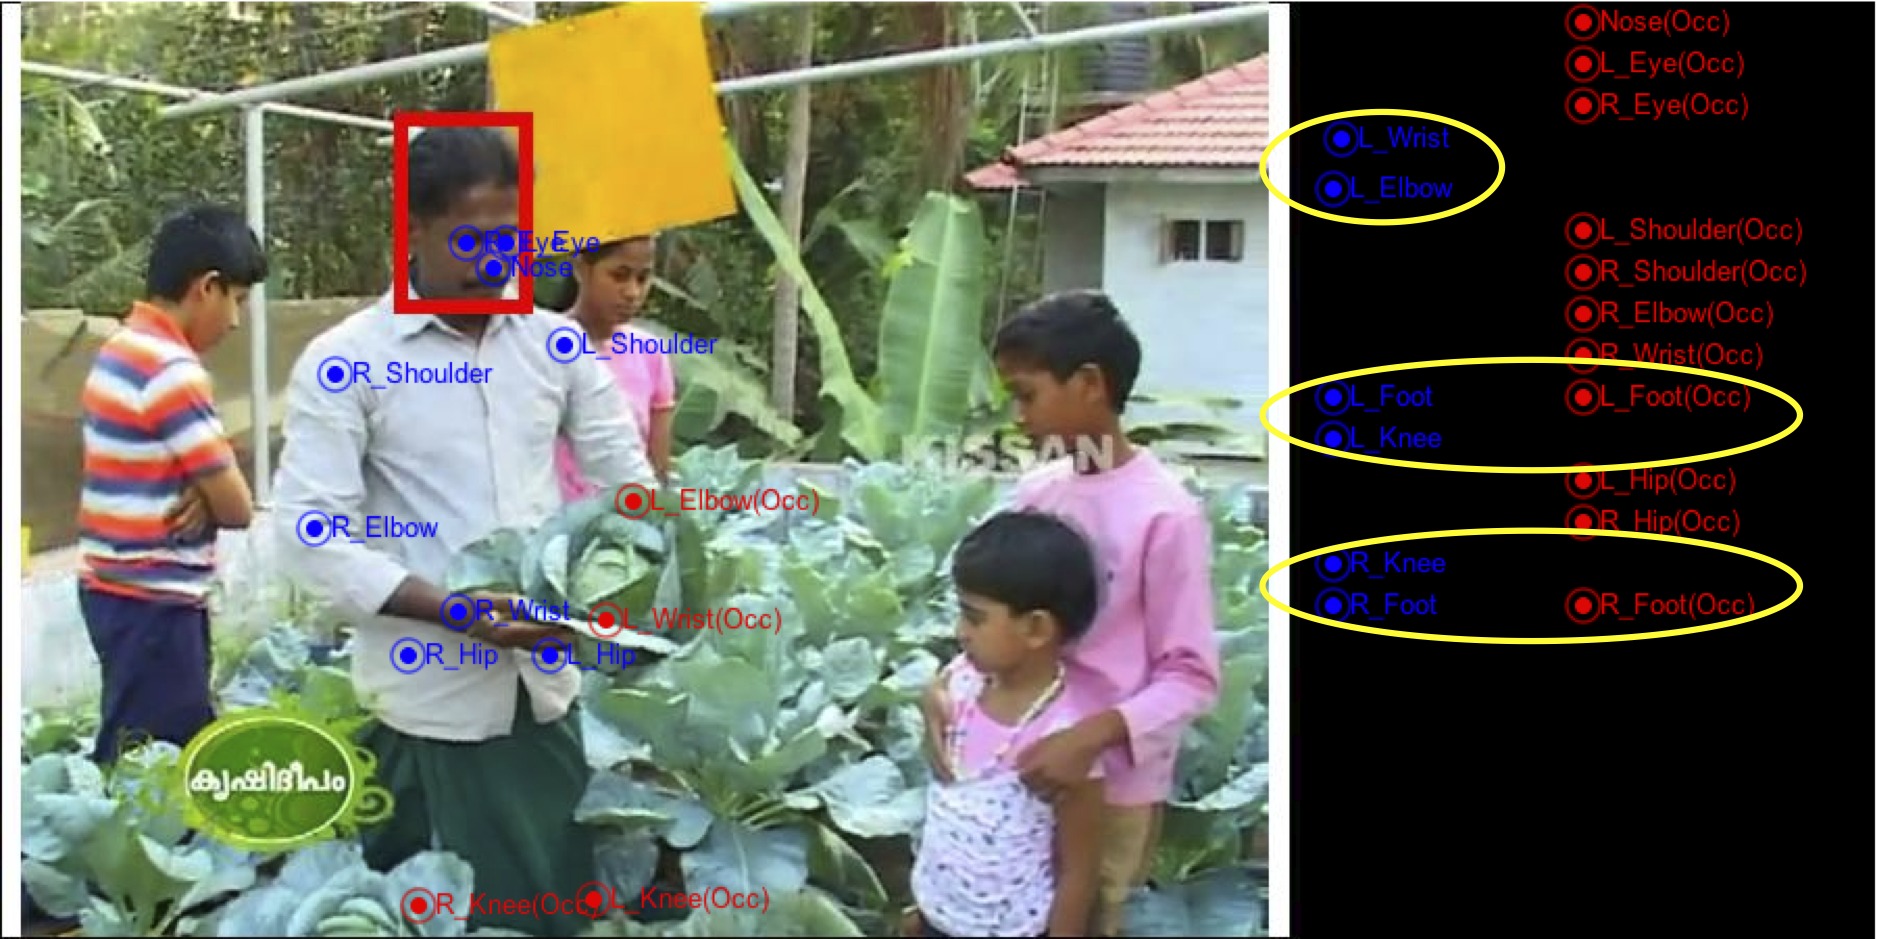 |
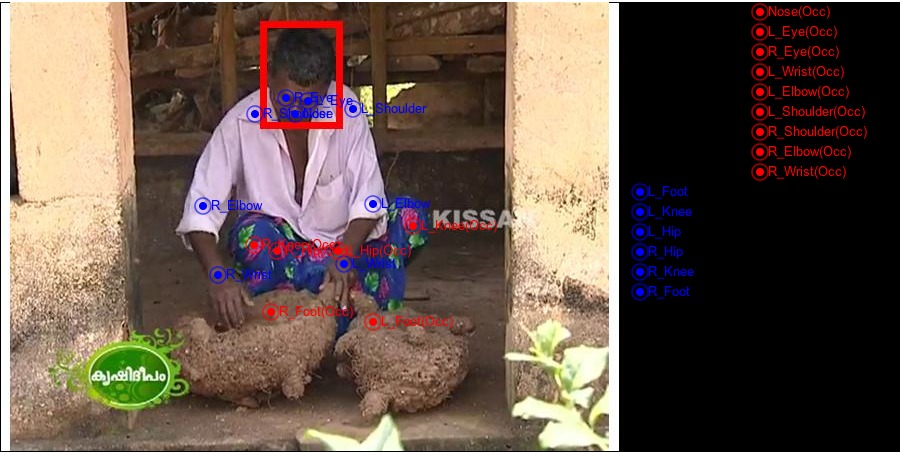
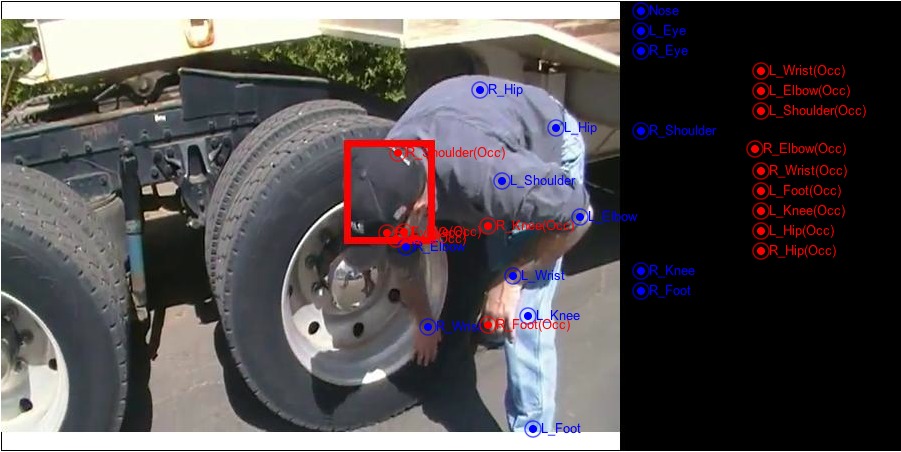
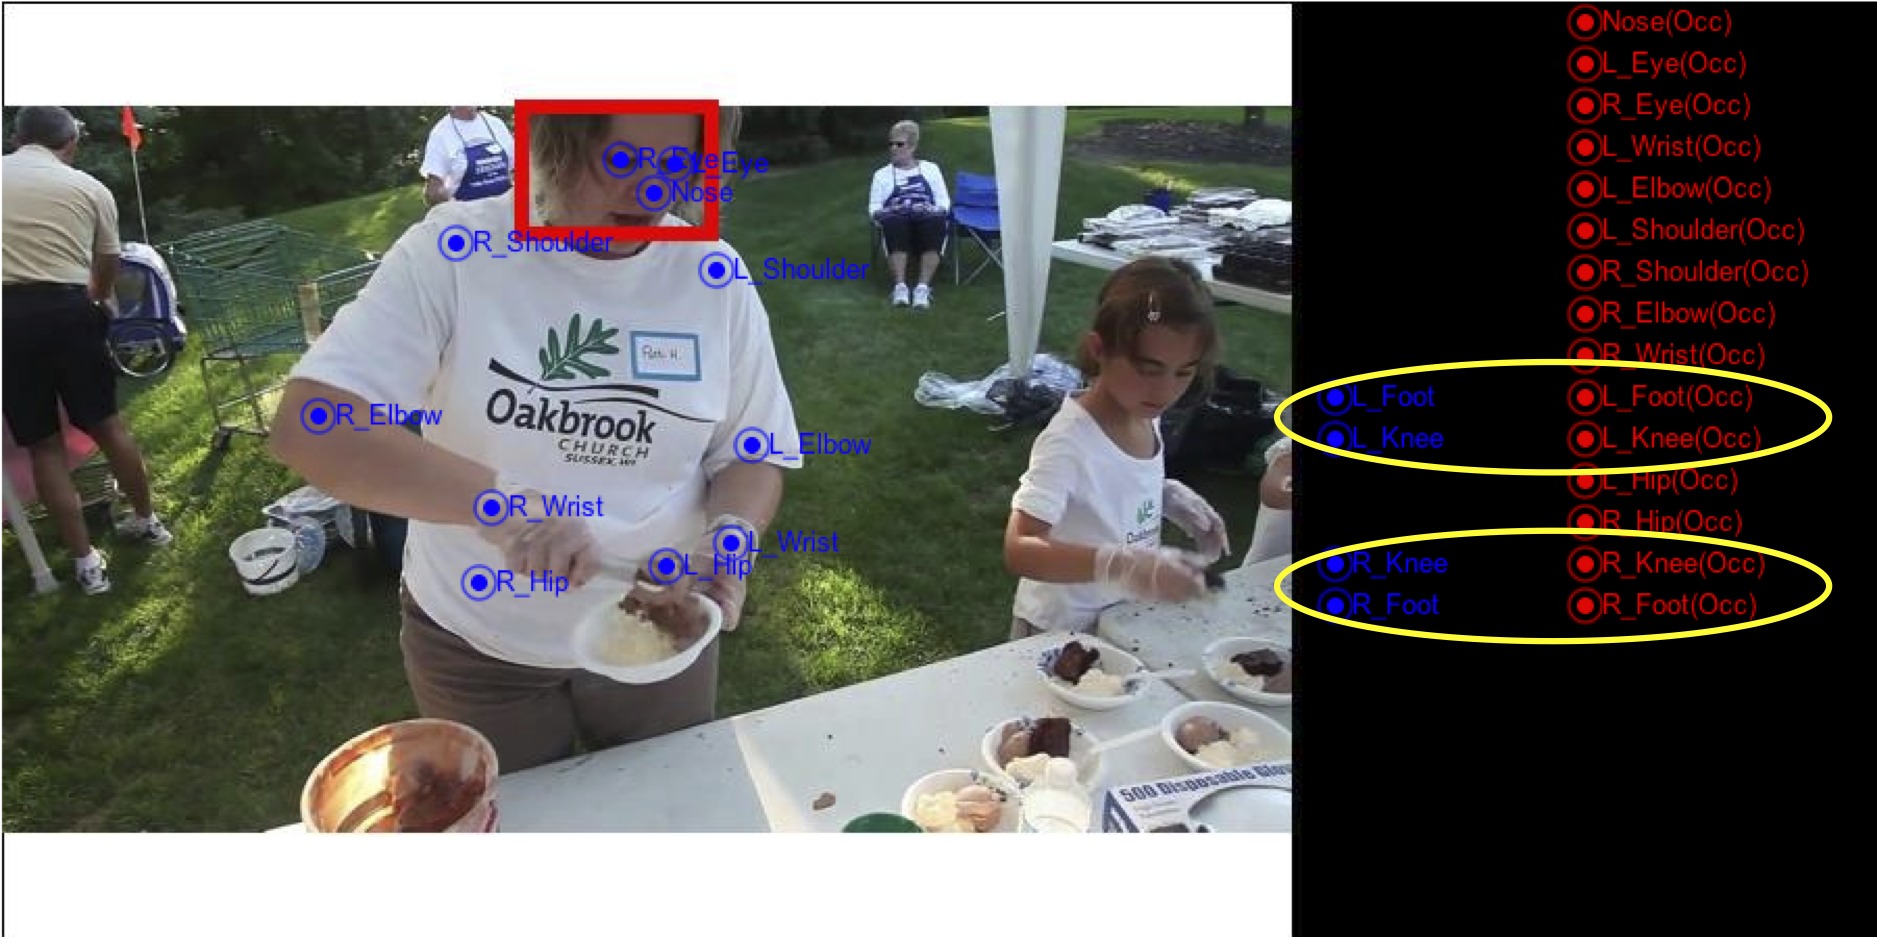
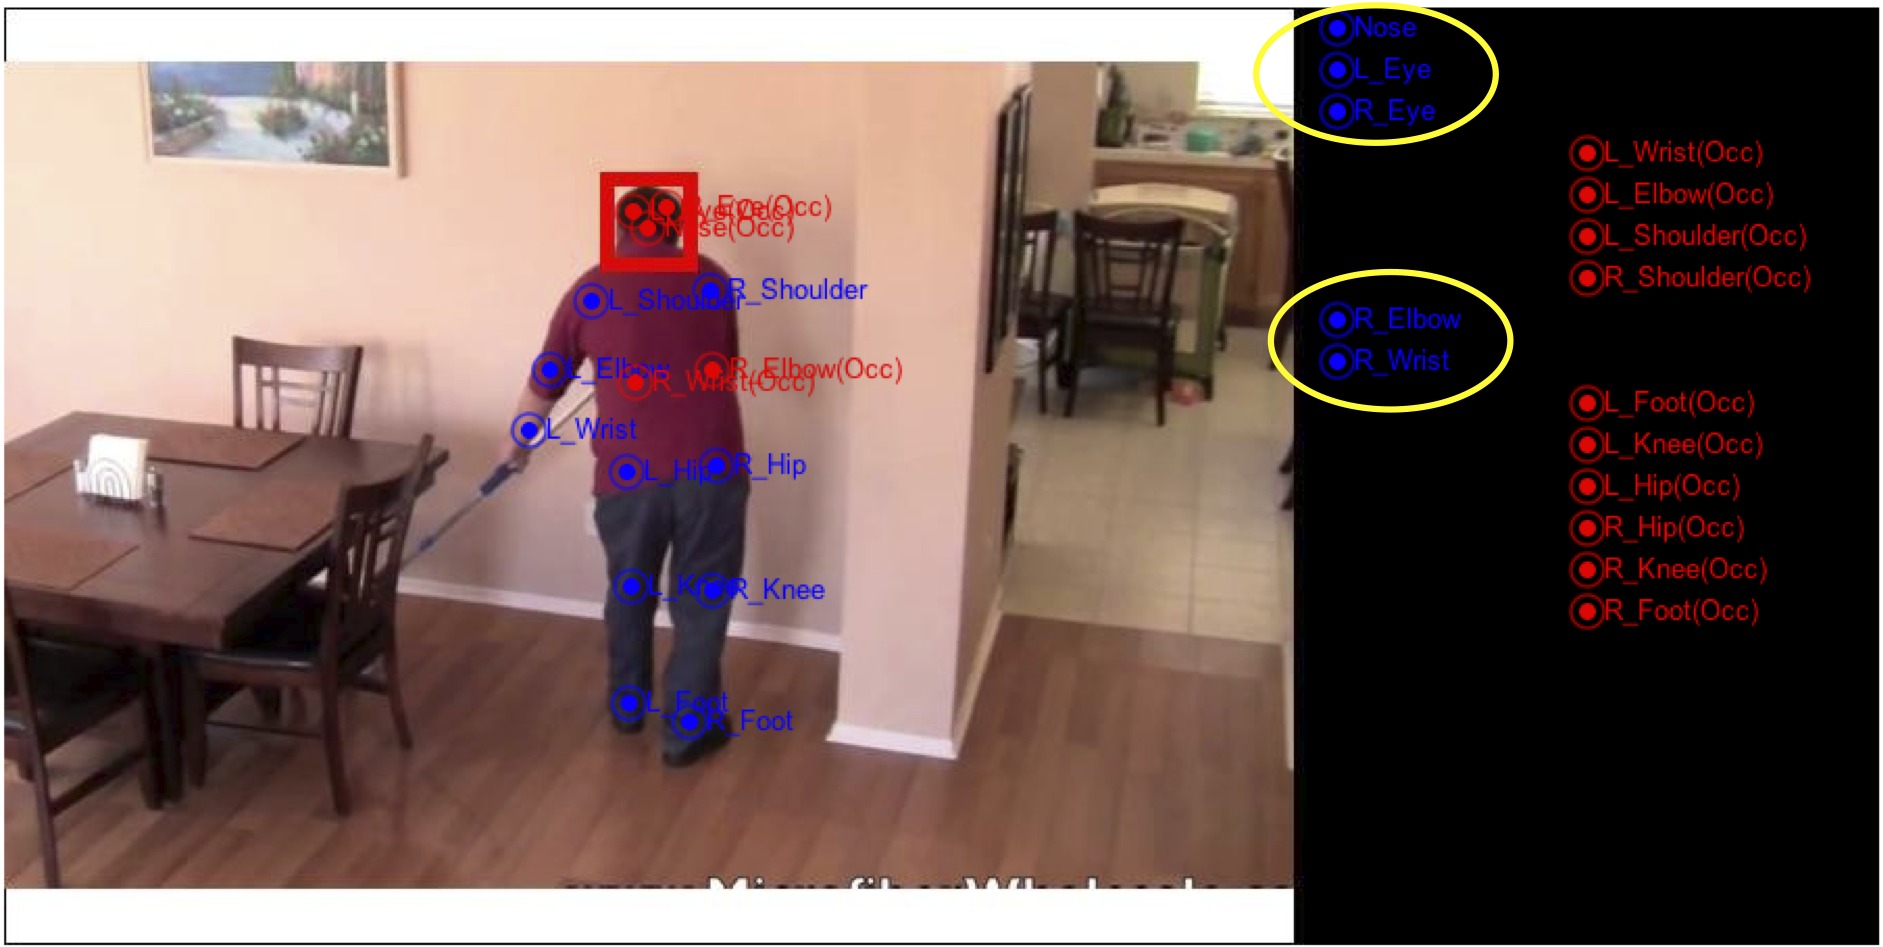
Left wrist and elbow
of the person are not visible because they are occluded by an object. Use
occluded markers  and guess the position of the keypoints behind the object. The
knees of the person are not visible because of the complex clothing, use occluded markers as well. The lower legs are outside of the image, leave the markers in the black area. and guess the position of the keypoints behind the object. The
knees of the person are not visible because of the complex clothing, use occluded markers as well. The lower legs are outside of the image, leave the markers in the black area. |
 |
| Nose and eyes are not visible because the person is shown from the back, use occluded markers . The right elbow and wrist are occluded by the torso and are annotated with occluded markers. |
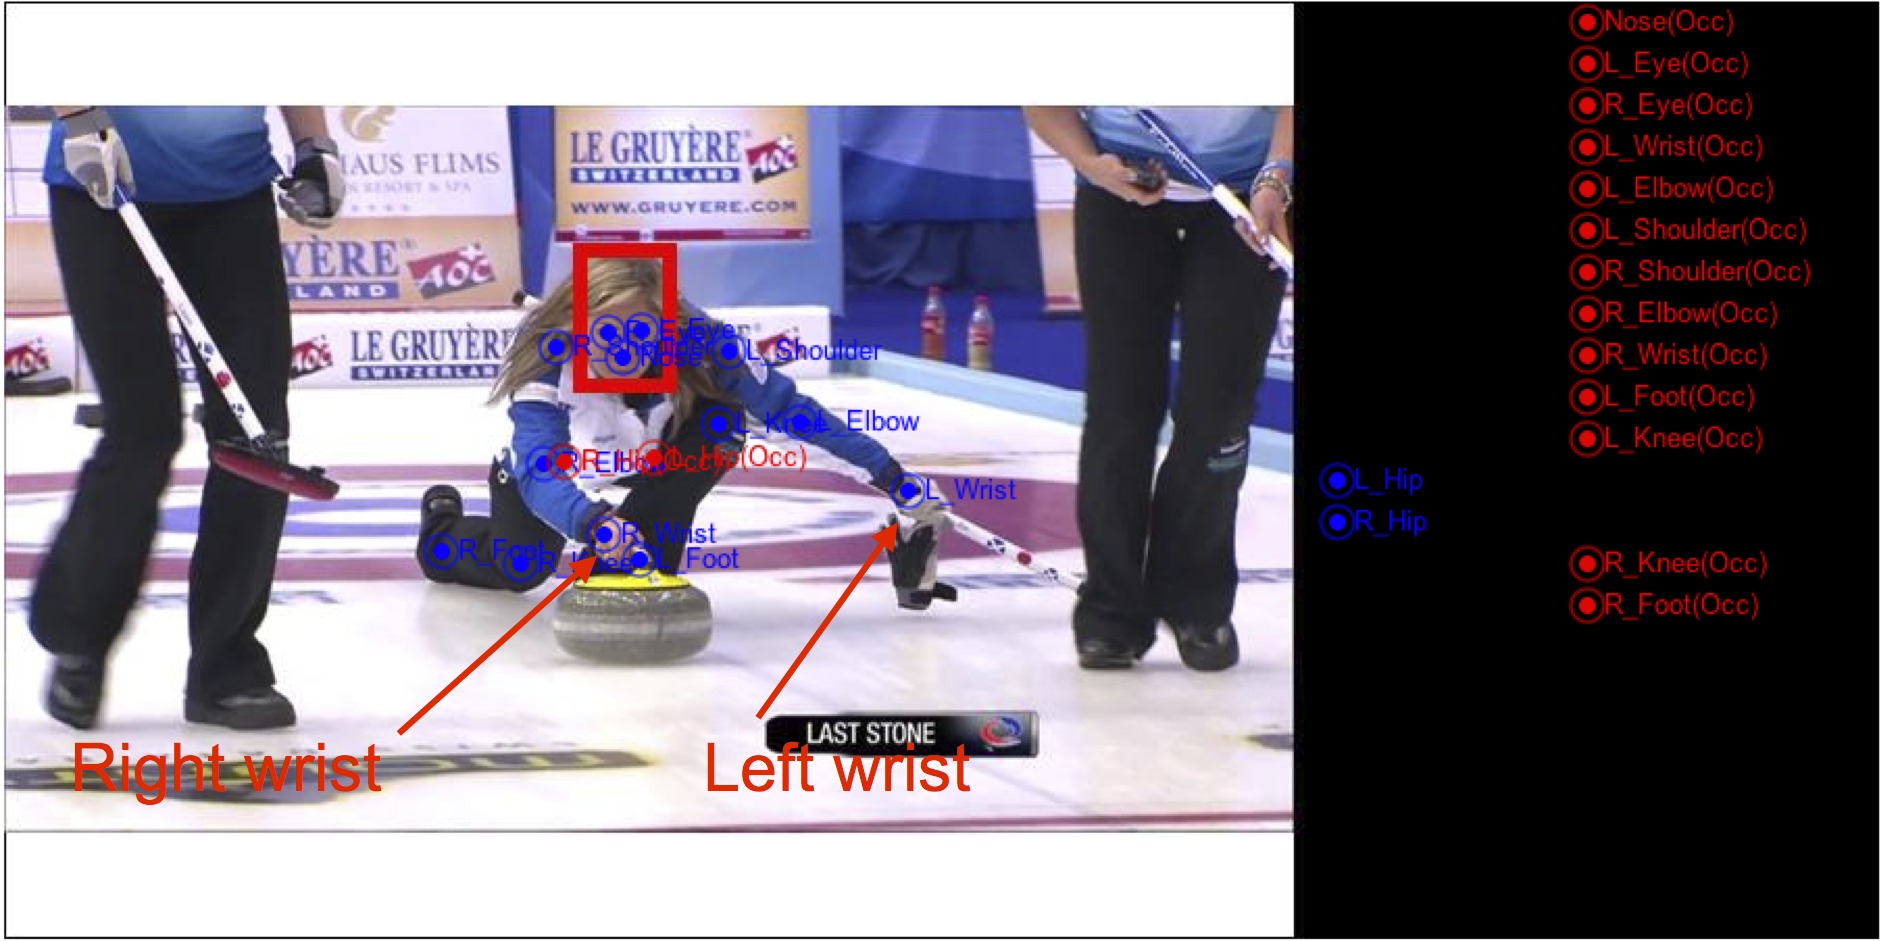
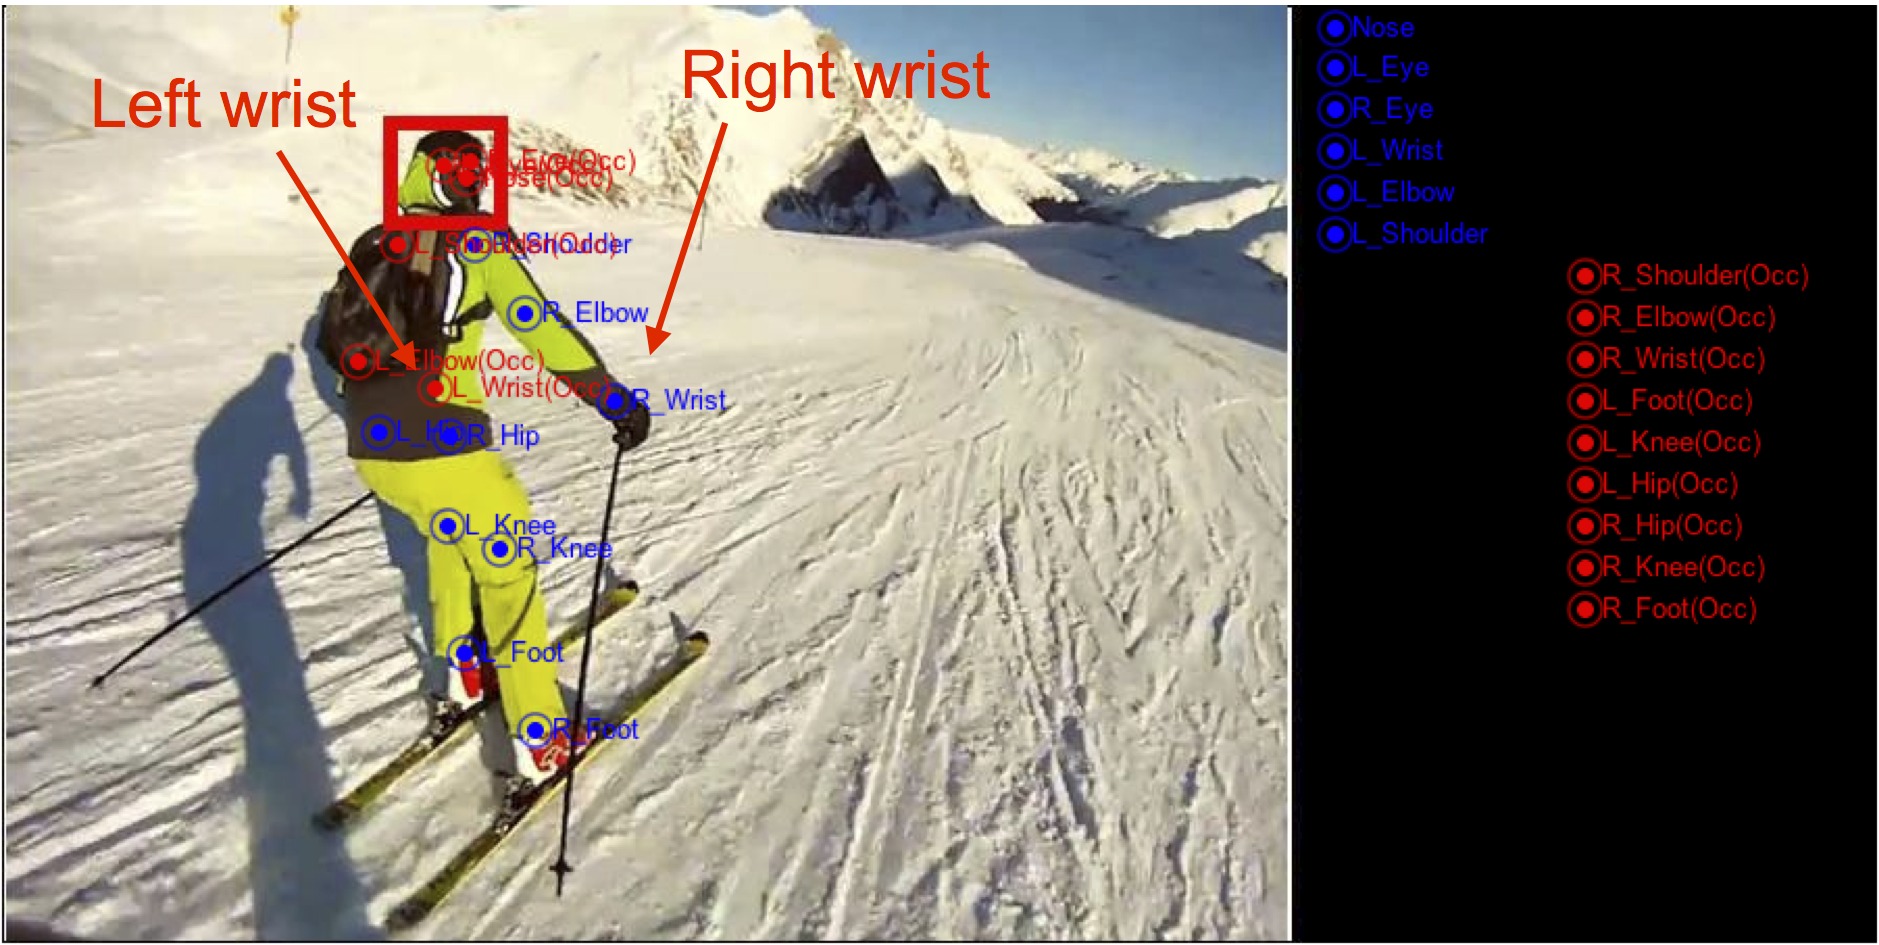
Left vs. Right
| By left and right limbs we refer to anatomical parts of the person, not the relation between limbs in the image. See examples below : |
 |
 |